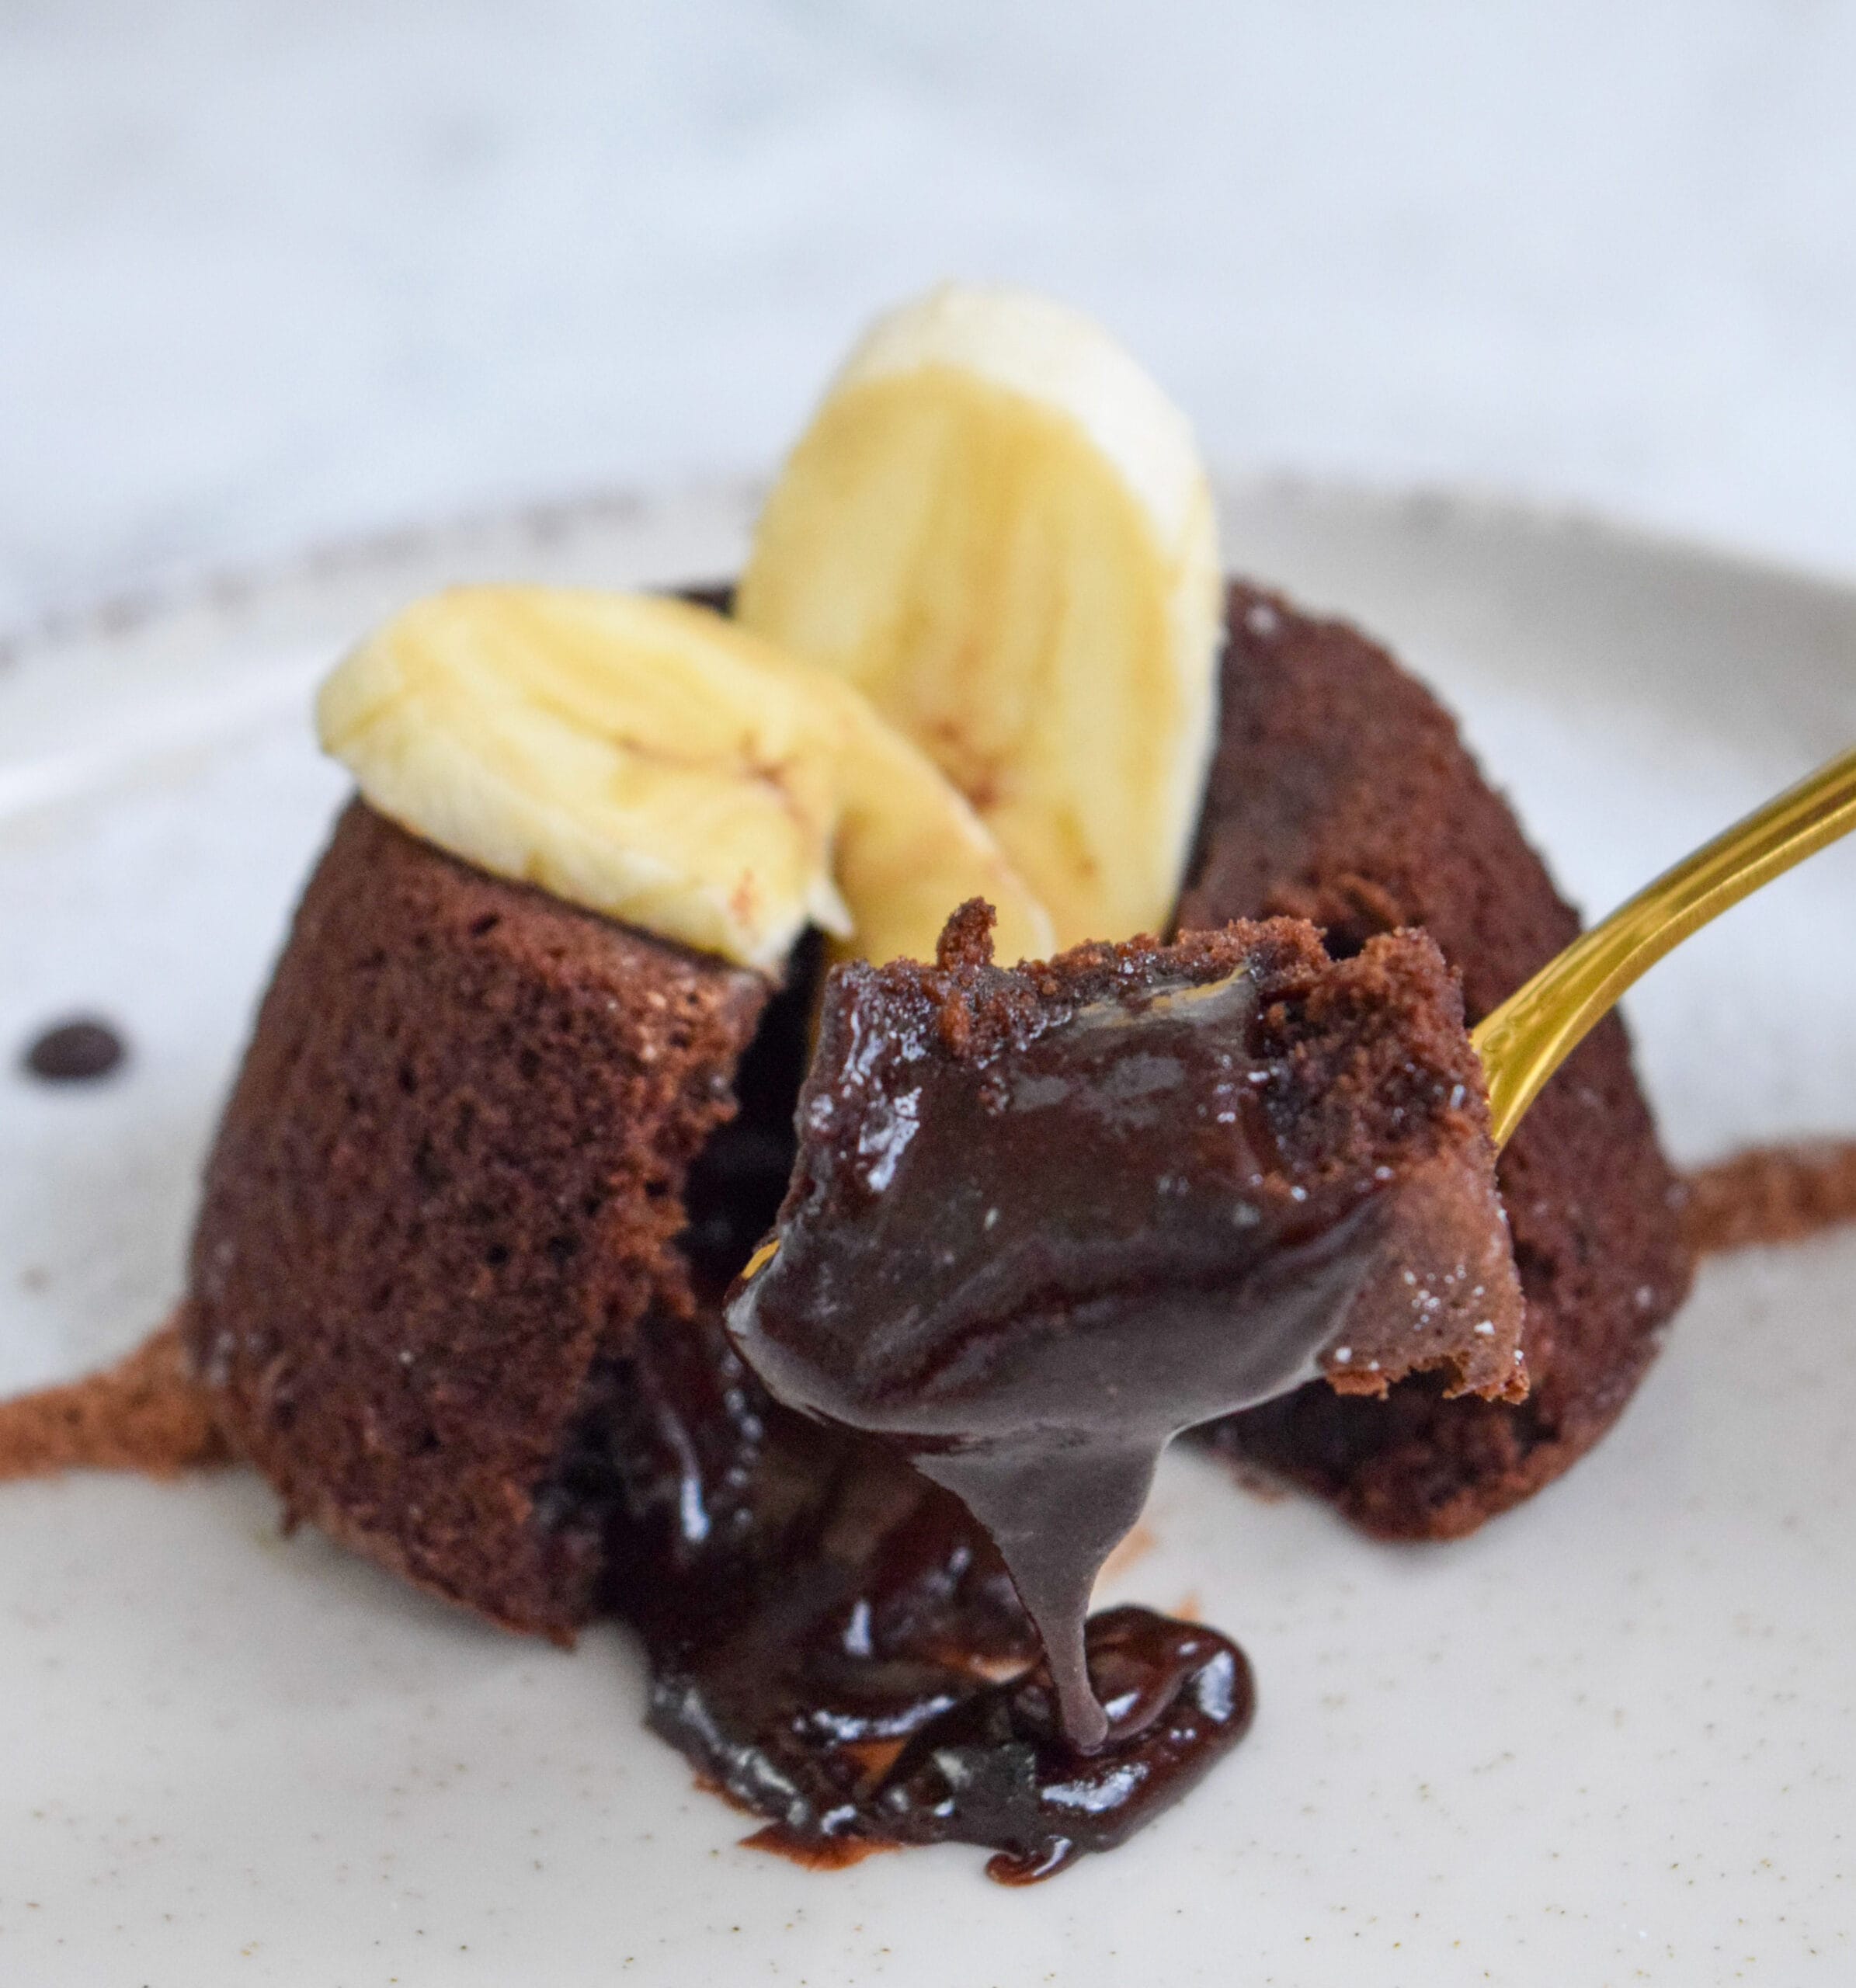
There’s something magical about cutting into a warm chocolate lava cake and watching that glossy river of molten chocolate spill onto the plate. It feels like something you’d order at a five-star restaurant, yet it’s surprisingly simple to make at home.
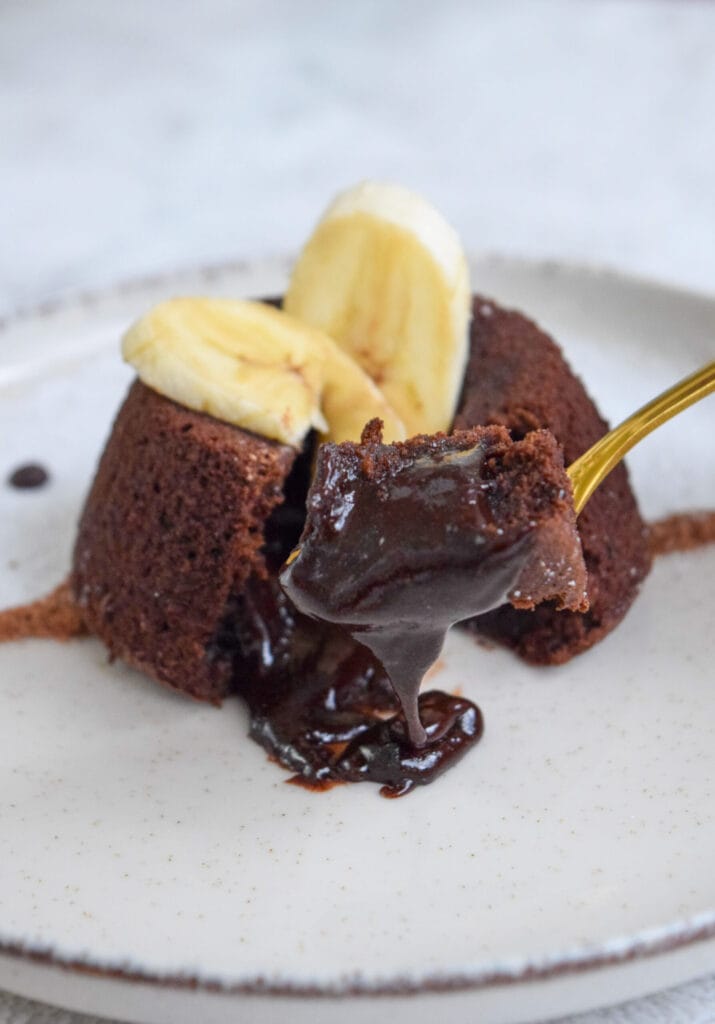
The first time I made molten chocolate cake, I was convinced I’d ruin it. Undercooked? Overbaked? Collapsed? But once I understood the science behind the gooey center, it became one of the easiest “impressive” desserts in my kitchen.
If you’ve ever wanted a guaranteed showstopper for date night, dinner parties, or a chocolate emergency, this is it.
Why This Chocolate Lava Cake Recipe Works
Chocolate lava cake isn’t about underbaking, it’s about controlled structure.
The magic happens because of a precise balance between fat, flour, temperature, and timing. When those elements work together, you get firm edges and a perfectly molten center.
Here’s why this one delivers every time:
- High fat ratio (butter and dark chocolate) creates a rich, fluid interior that stays soft even as the edges set.
- Minimal flour provides just enough structure to hold the cake together without fully cooking the center.
- High oven temperature (435°F / 225°C) sets the outer layer quickly, forming a delicate shell around the molten core.
- Short bake time (about 7 minutes) prevents the middle from cooking through
The balance of structure and fluidity is what transforms this from “chocolate cake” into a true molten chocolate cake.
Ingredient Highlights & Smart Substitutions
With a recipe this simple, every ingredient plays an important role. Small changes can noticeably affect texture and flavor, so here’s what matters most.
Dark Chocolate (70% Cocoa)
This is the backbone of flavor. A high-quality dark chocolate melts smoothly and creates that rich, fluid center.
For flavor adjustments:
- 60% chocolate for a slightly sweeter flavor
- 75-80% for a deeper, more intense flavor
Choose real baking chocolate. Avoid chocolate chips, they contain stabilizers that prevent smooth melting and can affect the molten texture.
Unsalted Butter
Butter adds silkiness and helps create that glossy molten texture. You can use salted butter (omit added salt), but avoid margarine, its higher water content can alter the structure and affect how the center sets.
Substitute:
- Use dairy-free butter if needed for a lactose-free version
Eggs
Eggs create structure while keeping the center creamy. Room temperature eggs blend better and help with volume.
Cocoa Powder
Cocoa intensifies the chocolate flavor and deepens the color without adding extra sweetness.
Always sift cocoa powder before mixing to avoid clumps.
Step-by-Step Tips for Success
I won’t repeat the full instructions here; your recipe card covers that perfectly. These are the small details that make the difference between good and perfectly molten.
1. Grease Ramekins Thoroughly
Coat every corner with softened butter, making sure the bottom and sides are fully covered. Then lightly dust with cocoa powder (not flour).
It prevents sticking without leaving a white residue, so your cakes release cleanly and keep their rich chocolate finish.
2. Watch the Edges, Not the Clock
Ignore the clock for a moment. Your oven may run hotter or cooler.
Around 6 minutes:
- The edges should look set and slightly puffed
- The surface will appear matte rather than glossy
- The center should still jiggle gently when you nudge the ramekin
That soft jiggle is the molten center. If the center looks fully set, remove it immediately.
3. Slight Cooling Is Essential
Let the cakes rest for about 1 minute to stabilize. This short pause allows the structure to stabilize, so they hold their shape when inverted.
Waiting longer allows residual heat to continue cooking the center.
Pro Tips for Perfect Results
These small technical adjustments can make the difference between a good lava cake and a flawless one.
- Preheat your baking tray: Place empty ramekins on a hot tray to help the bottoms set evenly.
- Use a kitchen scale: Lava cake is a high-fat, low-flour recipe, and even small measurement errors affect structure.
- Check your oven thermometer. Lava cake is highly temperature-sensitive. If your oven runs even 10-15°F hotter than indicated, the center can fully set.
- Test one cake first: If baking for guests, bake a single ramekin as a timing test. Every oven behaves differently.
- Don’t overmix after adding flour. Once flour goes in, mix just until combined. Overworking develops gluten, which can make the cake slightly.
- If your kitchen is cold, let the filled ramekins sit at room temperature for 5 minutes before baking. Cold butter firms up the batter, which can slightly affect how quickly the edges set.
Common Mistakes And How to Avoid Them
Overbaking
This is the #1 reason chocolate lava cake fails.
Solution: Start checking at 6 minutes. The edges should look set, but the center should still jiggle slightly when gently shaken. Remove immediately once you see that soft movement.
Using low-quality chocolate
Since this dessert relies heavily on chocolate for both structure and flavor, low-quality chocolate can result in a dull taste and grainy texture. Chocolate chips, in particular, contain stabilizers that affect smooth melting.
Solution: Use high-quality baking chocolate (around 60-70% cocoa) and melt it gently to keep it silky and smooth.
Skipping sifting
Cocoa powder tends to clump easily. If it isn’t sifted, those dry pockets can create uneven texture and small bitter lumps in the batter.
Solution: Always sift cocoa powder and flour before mixing. It takes seconds but ensures a smooth, uniform crumb.
Filling ramekins too full
Overfilled ramekins can cause the cakes to rise unevenly, overflow, or cook inconsistently, leading to firm centers instead of molten ones.
Solution: Fill ramekins only about ¾ full. This allows proper rise while keeping the center soft.
Letting Cakes Sit Too Long Before Serving
Even after removing from the oven, residual heat continues cooking the center. Waiting too long before unmolding can eliminate the lava effect.
Solution: Let the cakes rest for 1 minute only, then gently invert and serve immediately for the best molten texture.
Storage & Reheating Tips
Chocolate lava cake is best enjoyed fresh from the oven when the center is perfectly molten. However, with the right approach, you can prepare it ahead or store leftovers successfully.
Make Ahead
You can prepare the batter and divide it into greased ramekins up to 24 hours in advance. Cover tightly with plastic wrap and refrigerate.
When ready to bake:
- Bake directly from the cold.
- Add about 1 extra minute to the baking time.
- Still relies on visual cues, set edges, and a slightly jiggly center.
This makes it perfect for dinner parties, as all the prep is done in advance.
Storing Baked Cakes
If you have leftovers, allow the cakes to cool completely, then cover and refrigerate for up to 3 days.
Once cooled, the center will set and become more fudgy than molten.
Reheating
To warm leftovers:
- Microwave for 15-20 seconds.
- Heat just until warmed through; overheating will firm up the center.
Freezing is not recommended for optimal texture.
Can You Freeze Lava Cake?
Freezing baked lava cakes is not recommended. The delicate texture changes after thawing, and the molten center effect is difficult to restore.
If you need to prepare further in advance, refrigerating the unbaked batter is the better option.
Flavor Variations & Ideas
Once you master the classic chocolate lava cake, it’s easy to customize the flavor while keeping that molten center intact.
Espresso Boost
Add 1 teaspoon espresso powder to the melted chocolate mixture. Espresso doesn’t make the cake taste like coffee; it deepens and intensifies the chocolate flavor.
Salted Lava Cake
Finish with a small pinch of flaky sea salt immediately after unmolding. The salt enhances sweetness and balances the richness beautifully.
Orange Chocolate
Stir in ½ teaspoon finely grated orange zest into the batter. The citrus oils brighten the chocolate and add subtle complexity.
Peanut Butter or Nutella Center
Place 1 teaspoon of peanut butter or Nutella in the center of each filled ramekin before baking. Do not stir it in, let it sit in the middle for a layered molten effect.
Gluten-Free Version
Substitute the all-purpose flour with a 1:1 gluten-free flour baking blend.
Because this recipe uses minimal flour, it adapts very well without affecting the molten texture.
Serving Suggestions
Chocolate lava cake is rich and indulgent on its own, but the right pairing turns it into a full dessert experience.
Vanilla bean ice cream
The classic choice. The contrast between warm molten chocolate and cold, creamy ice cream creates the perfect temperature balance and enhances the lava effect as it melts into the cake.
Fresh Raspberries
Their natural tartness cuts through the richness and adds freshness and color to the plate.
Lightly Sweetened Whipped Cream
Soft, airy cream balances the density of the cake without overpowering the chocolate flavor.
Powdered Sugar Dusting
A simple dusting adds visual elegance and a bakery-style finish.
Salted Caramel Drizzle
Adds buttery sweetness and a subtle salty contrast that intensifies the chocolate.
For an Elevated Presentation
Serve on a warm plate with a scoop of ice cream slightly offset, a few raspberries, and a light dusting of cocoa powder. A small mint leaf adds color without distracting from the dessert.
Conclusion
Chocolate lava cake feels like a luxury dessert, but it’s built on a simple technique and timing. Once you understand the balance between structure and molten center, it becomes one of the most reliable desserts you can make.
Bake it once, and it’ll become your secret weapon dessert for every special occasion.
If you try this chocolate lava cake, leave a comment and rating below. I’d love to hear how your molten center turned out. And don’t forget to share it with someone who needs a little chocolate magic today.
Chocolate Lava Cake
Ingredients
Equipment
Method
- Preheat oven to 435°F (225°C).
- Melt the chocolate and butter together using a double boiler or microwave. Stir until smooth and let cool slightly.
- In a large bowl, whisk the eggs sugar and salt until pale and slightly thickened.
- Sift in the flour and cocoa powder. Mix until fully combined.
- Slowly fold in the melted chocolate mixture until smooth.
- Grease ramekins well and fill about 3/4 full.
- Bake for exactly 7 minutes. The edges should look set while the center remains soft and slightly jiggly.
- Let rest 1 minute, then carefully invert onto a plate and serve immediately.
Notes
- Do not overbake or the center will fully set.
- Every oven is different – check at 6 minutes.
- The center should jiggle slightly when gently shaken.
- Serve immediately for best molten texture.
Leave a Reply to Lina Cancel reply